floor installation material, budgets, maintaining
New flooring changes more than a room’s appearance; it influences comfort underfoot, cleaning routines, sound levels, and even resale appeal. Many projects stumble because material choices are rushed, labor is underestimated, or subfloor problems stay hidden until work begins. This guide walks through floor installation services, compares common materials, explains budget decisions, and covers maintenance after the last plank or tile is set. Think of it as a map before the renovation dust starts to rise.
Outline
- How floor installation services work and why planning matters before any material is ordered
- How hardwood, laminate, vinyl, tile, and carpet compare in cost, durability, and everyday use
- How to build a realistic budget that includes labor, preparation, waste, and surprise repairs
- What happens during installation, including timelines, methods, and quality checks
- How to maintain new floors and choose a service plan that matches your home and habits
1. Planning the Project and Understanding Floor Installation Services
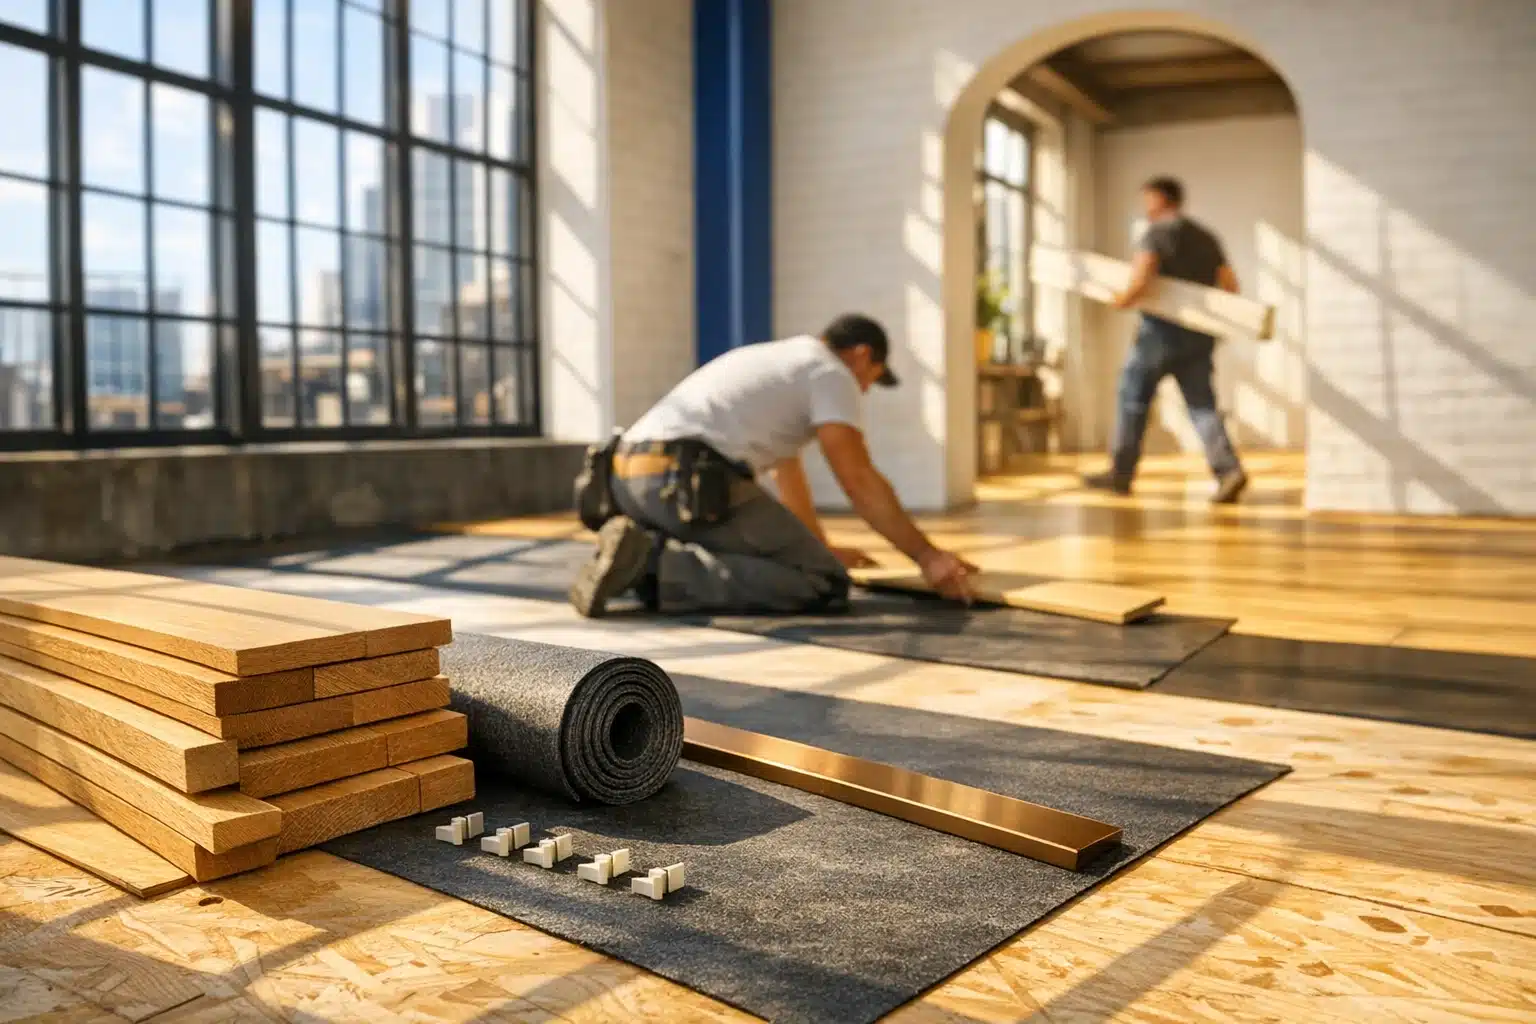
Floor installation looks simple from a distance. Old surface out, new surface in, room transformed. In practice, the result depends heavily on what happens before the first board, plank, tile, or carpet roll arrives. Professional floor installation services usually begin with measuring the space, checking the condition of the subfloor, discussing room usage, and matching the installation method to the material. That early stage matters because flooring failure often starts below the visible surface. Creaking, cracked tile, loose planks, or uneven wear can come from poor preparation rather than bad product quality.
A reputable installer will usually inspect moisture levels, flatness, and transitions between rooms. For wood-based products, moisture is a serious issue because excess humidity can lead to swelling, cupping, or gapping. Tile needs a stable base to avoid cracked grout or broken edges. Floating floors require the right underlayment and expansion space. Even carpet benefits from careful prep, because worn padding or rough subfloors can shorten its life. In other words, the floor you admire every day is only as reliable as the surface beneath it.
Homeowners also need to understand what a service quote should include. Some companies offer material-only pricing at first, then add demolition, disposal, furniture moving, trim work, and leveling later. Others provide a more complete estimate from the start. That is why clear written scope is essential. A useful quote often covers:
- Room measurements and waste allowance
- Removal and disposal of old flooring
- Subfloor inspection and repair assumptions
- Underlayment, adhesives, fasteners, or grout
- Baseboards, quarter round, or transition strips
- Labor timeline and post-installation cleanup
Waste allowance deserves special attention. Installers usually order more material than the exact square footage because cuts, pattern matching, damaged pieces, and future repairs all require extra stock. A common planning range is around 5 to 10 percent extra for many straightforward layouts, while complex patterns or diagonal installations may require more. Skipping that cushion can delay a project if matching material becomes unavailable later.
Good planning also means thinking about the household itself. Will pets race across the floor? Will children drop toys, spill drinks, or drag chairs? Is the room exposed to strong sunlight or tracked-in rain? A floor is the stage every shoe, table leg, and sunbeam will touch. Installation services are not just about putting something down; they are about fitting a surface to the rhythm of real life. When planning is done well, the rest of the project becomes faster, cleaner, and more predictable.
2. Comparing Flooring Materials: Performance, Cost, and Best Use
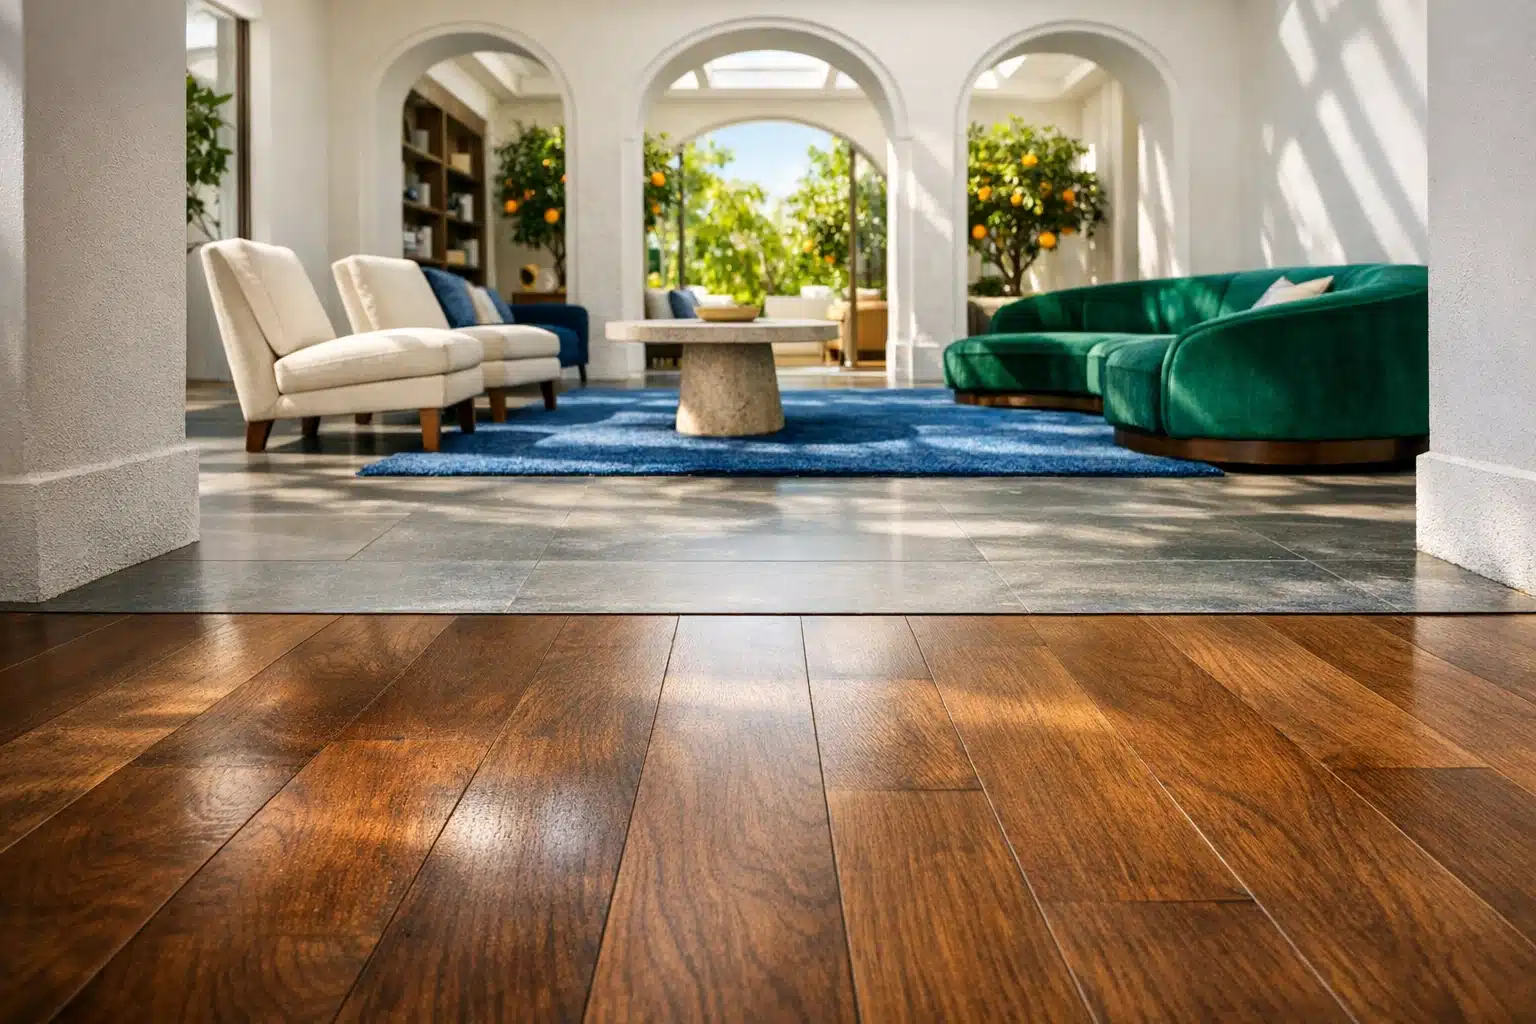
Choosing a flooring material is where style and practicality finally sit at the same table. A glossy hardwood sample may look perfect in a showroom, but the right floor for a quiet bedroom may not be the right floor for a kitchen, rental property, or busy hallway. The most common residential options each have clear strengths, trade-offs, and price ranges, so comparing them honestly is better than chasing trends.
Solid hardwood remains popular because it offers warmth, natural variation, and the ability to be refinished more than once in many cases. It can add long-term appeal, especially in living rooms, bedrooms, and homes where traditional design matters. However, it is sensitive to moisture and usually costs more than laminate or vinyl. Engineered wood gives a similar look with better dimensional stability, making it more suitable for areas where humidity changes are common. It still does not like standing water, but it can be a smart middle ground between beauty and practicality.
Laminate is often chosen for affordability and scratch resistance. Modern laminate visuals have improved significantly, and many products mimic wood grain convincingly from a normal viewing distance. Still, water resistance varies by brand and construction, so kitchens, entryways, and bathrooms require careful product selection. Luxury vinyl plank and luxury vinyl tile have grown rapidly because they are durable, comparatively water-resistant, and available in many styles. For households with pets, children, or frequent spills, vinyl often offers a strong balance of performance and cost.
Tile, especially porcelain, is prized for durability and moisture resistance. It works well in bathrooms, laundry rooms, mudrooms, and kitchens. Its downsides can include hardness underfoot, colder surface temperature, and higher labor costs, especially if the layout is intricate. Carpet remains relevant for bedrooms and spaces where softness, warmth, and sound control matter, though it tends to stain more easily and may wear faster in heavy-traffic zones.
A quick comparison helps frame the decision:
- Hardwood: attractive, refinishable, higher cost, lower moisture tolerance
- Engineered wood: stable, stylish, mid-to-high cost, moderate moisture tolerance
- Laminate: affordable, scratch-resistant, variable water resistance
- Luxury vinyl: practical, water-friendly, comfortable, broad price range
- Tile: durable, moisture-resistant, cooler and harder underfoot
- Carpet: soft and quiet, lower comfort noise, higher stain sensitivity
Material pricing varies by market, quality, thickness, and brand, but broad retail ranges often begin around 1 to 5 dollars per square foot for basic laminate, 2 to 7 dollars for many vinyl products, 3 to 10 dollars for engineered wood, 5 dollars and up for solid hardwood, and a very wide spread for tile depending on design. Labor is separate and can change the final ranking. The right question is not only “What looks best?” but also “What fits this room, this budget, and this lifestyle five years from now?”
3. Building a Realistic Budget: Materials, Labor, and Hidden Costs
Budgeting for new flooring often starts with square footage and a price tag from a website. That is a reasonable first step, but it rarely reflects the full project cost. A realistic budget includes materials, installation labor, site preparation, trim and transitions, waste, taxes, and a cushion for unexpected repairs. Homeowners who budget only for visible materials often feel surprised when the final number climbs. In reality, those added charges are usually not random; they are part of completing the job properly.
Labor can be a major share of the total, especially with tile, patterned layouts, stairs, or rooms that need extensive leveling. Removing old flooring adds time and disposal fees. Heavy furniture may require moving charges. If the subfloor has rot, moisture damage, squeaks, or low spots, repairs can become unavoidable before installation continues. That is not upselling when documented honestly; it is risk management. Installing over a bad base may save money today and cost much more later.
Here are common budget items people overlook:
- Underlayment or moisture barriers
- Adhesives, grout, spacers, and fasteners
- Baseboard removal and reinstallation
- Door trimming for thicker flooring
- Transition strips between rooms
- Delivery fees and debris disposal
- Acclimation time that affects scheduling
A simple example shows how quickly totals shift. Imagine a 300-square-foot room using mid-range luxury vinyl priced at 4 dollars per square foot. Material cost might start near 1,200 dollars. Add 10 percent waste, and material moves closer to 1,320 dollars. Labor may range widely by region, but even a moderate installation rate can add several hundred dollars more. If the old floor must be removed, the subfloor leveled, and trim replaced, the all-in budget can rise meaningfully above the original estimate. The lesson is not that flooring is unaffordable; it is that complete pricing is more useful than optimistic pricing.
When comparing quotes, ask whether each bid is truly comparable. One installer may include underlayment, haul-away, and transitions, while another leaves them out. A lower quote is not automatically a better quote. It may simply be a narrower scope. Ask for line items, material specifications, warranty details, and payment terms in writing. Also reserve contingency funds, often around 10 percent of the project budget, especially in older homes where hidden floor conditions are more common.
A thoughtful budget does more than control spending. It reduces rushed decisions, prevents material downgrades late in the project, and gives homeowners confidence when they sign the contract. Good flooring is not always cheap, but clear budgeting helps make it feel manageable rather than chaotic.
4. What Happens During Installation: Process, Timeline, and Quality Checks
Once materials are selected and the contract is signed, many homeowners want to know the same thing: what exactly happens next? The installation phase usually follows a predictable sequence, although the details vary by material. First comes site preparation. Furniture is moved, old flooring is removed if needed, and the subfloor is cleaned, checked, and corrected. Installers may fill low spots, sand high spots, tighten loose areas, or add moisture protection. This is the unglamorous part of the job, but it is also the part that prevents visible problems later.
After preparation, some materials need acclimation. Wood and certain wood-based products may need time inside the home so their moisture content can adjust closer to the indoor environment. Skipping acclimation can contribute to movement after installation. Then the crew begins layout planning. This step affects both appearance and waste. A careful installer tries to avoid awkward slivers at walls, keep visual lines balanced, and position transitions where they function well. With patterned tile or directional plank designs, layout can make the difference between a room that feels polished and one that quietly looks off.
Installation methods vary:
- Floating floors click together over underlayment and are not fixed directly to the subfloor
- Glue-down products rely on adhesive and careful surface prep
- Nail-down wood flooring is fastened to wood subfloors
- Tile is set in mortar and finished with grout after curing
- Carpet is stretched over padding and secured along edges
Timelines depend on room size, site conditions, and material choice. A simple floating floor in a modest room may move quickly, while tile installations often take longer because of cutting, setting, curing, and grouting stages. Staircases, custom borders, or occupied homes with limited work hours can extend the schedule. Weather and delivery delays can also affect timing, especially if special-order material is involved.
Quality checks matter at the end. Homeowners should review seams, transitions, trim alignment, grout consistency, expansion gaps where appropriate, and overall cleanliness. Open the conversation before the crew leaves, not weeks later. A punch list is normal on professional jobs. So is asking questions about cure time, when furniture can return, and when rugs can be placed. For example, some adhesive-based floors should not face heavy traffic immediately, and freshly installed finishes may need extra care in the first days.
If you prepare the household well, the installation period feels much easier. Keep pets away from work areas, plan alternate access routes, and expect some noise and dust even with careful containment. Renovation rarely feels magical in the middle of it. Still, when the final boards lock into place or the last tile is cleaned, a room can change almost overnight.
5. Maintaining New Floors and Final Advice for Homeowners
Installation day is not the finish line; it is the beginning of ownership. Even excellent flooring will age poorly if it is cleaned the wrong way, exposed to standing water, or left unprotected from scratches. Maintenance does not need to be complicated, but it should match the material. Wood floors usually benefit from regular dry dusting or vacuuming with a hard-floor setting, quick attention to spills, and stable indoor humidity. Many professionals recommend keeping indoor humidity in a moderate range, often around 35 to 55 percent, to help reduce dramatic expansion and shrinkage. Tile is generally low maintenance, though grout lines may need periodic sealing depending on the product used. Vinyl and laminate usually do best with soft sweeping tools and damp, not soaking, mops. Carpet requires routine vacuuming and prompt stain treatment.
Small habits make a large difference over time:
- Use felt pads under furniture legs
- Place mats at exterior doors to catch grit and moisture
- Clean spills quickly instead of letting them sit
- Avoid harsh cleaners that can dull finishes or leave residue
- Lift heavy furniture rather than dragging it
- Follow manufacturer care instructions to protect warranty coverage
Maintenance also includes watching for early warning signs. A hollow sound under planks, cracked grout, separating seams, or unusual movement can signal moisture or installation issues. Catching those signs early is usually cheaper than waiting until damage spreads. Keep a few spare boards or tiles from the original installation if possible. They can be invaluable for future spot repairs, especially if the product is later discontinued.
For homeowners deciding whether to hire professionals or attempt part of the project themselves, the answer depends on the material, the room, and your tolerance for mistakes. A floating floor in a simple room may be approachable for skilled do-it-yourself work. Tile layouts, staircase installations, large open areas, and subfloor repairs often justify professional help. Paying for expertise can save time, reduce waste, and protect the finish you are investing in.
For the target audience of this guide, namely homeowners and renovators trying to balance looks, budget, and durability, the smartest path is usually clear planning followed by realistic expectations. Choose material based on how the room is actually used, not only how it photographs. Read quotes closely, prepare for hidden costs, and treat maintenance as part of the purchase rather than an afterthought. Done well, a new floor does more than refresh a space. It supports daily life quietly, reliably, and for many years under everything that home asks of it.