floor installation material, budgets, maintaining
Picking new flooring is exciting until samples, quotes, and renovation dust all show up at once. A beautiful surface can improve comfort and resale appeal, yet the wrong material or a rushed install may cause noise, gaps, stains, or early wear. This guide turns a technical process into practical steps by covering material choices, service options, budgeting, and maintenance in plain English. Whether you are refreshing one room or an entire property, the aim is simple: spend wisely and get a floor that fits everyday life.
Article Outline
This guide is organized into five practical parts so readers can move from planning to long-term care without losing the plot.
• Section 1 explains how to choose flooring materials based on room conditions, appearance, lifespan, and day-to-day use.
• Section 2 looks at what professional floor installation services actually include, from site inspection to finishing details.
• Section 3 breaks down budgets, typical cost ranges, and the extra charges that often catch homeowners off guard.
• Section 4 compares DIY installation with hiring a professional and shows how to evaluate contractors before signing a quote.
• Section 5 covers maintenance habits that protect the investment and keep different flooring types looking presentable for years.
Choosing Flooring Materials for Function, Style, and Lifespan
The first big decision in any flooring project is not color, brand, or plank width. It is suitability. A floor has to survive the room it lives in. Kitchens face spills, bathrooms deal with humidity, hallways collect grit, and bedrooms usually call for warmth and quiet. When homeowners skip this basic reality check, they often end up paying twice: once for the original installation and again for early replacement. Good floor installation services usually begin by discussing traffic level, moisture exposure, pets, children, furniture weight, and even how much sunlight enters the room. Those details shape the smartest material choice.
Hardwood remains popular because it offers a classic look and can often be refinished several times, but it is sensitive to moisture and humidity swings. Engineered wood gives a similar appearance with better dimensional stability, which makes it a practical middle ground for many living rooms and finished basements. Laminate is often chosen for budget-friendly projects because it resists scratches reasonably well and comes in many designs, though standing water can still be a problem depending on the product. Luxury vinyl plank and tile have grown quickly in the market because they combine water resistance, easy cleaning, and designs that convincingly mimic wood or stone. Ceramic and porcelain tile excel in wet areas and can last for decades, but they feel harder underfoot and usually require more labor during installation. Carpet still has a place in bedrooms, stairs, and spaces where softness and sound control matter most, though it demands more frequent cleaning.
It helps to compare materials using a few practical filters rather than showroom emotion alone:
• Moisture tolerance: vinyl and tile generally perform better than solid hardwood in damp spaces.
• Wear resistance: laminate, tile, and many vinyl products work well in high-traffic areas.
• Comfort: carpet and some underlayment-backed products feel softer and quieter.
• Repair options: hardwood may be refinished, while damaged sheet materials are often replaced instead.
• Design flexibility: tile and vinyl offer a huge range of patterns, textures, and sizes.
A clever flooring choice often balances appearance with routine behavior. If muddy shoes storm through the back entrance every day, a delicate floor will not suddenly become practical because the sample board looked perfect under store lighting. Flooring is one of the few design decisions you literally live on, so the best material is the one that keeps looking sensible after the first week of real life.
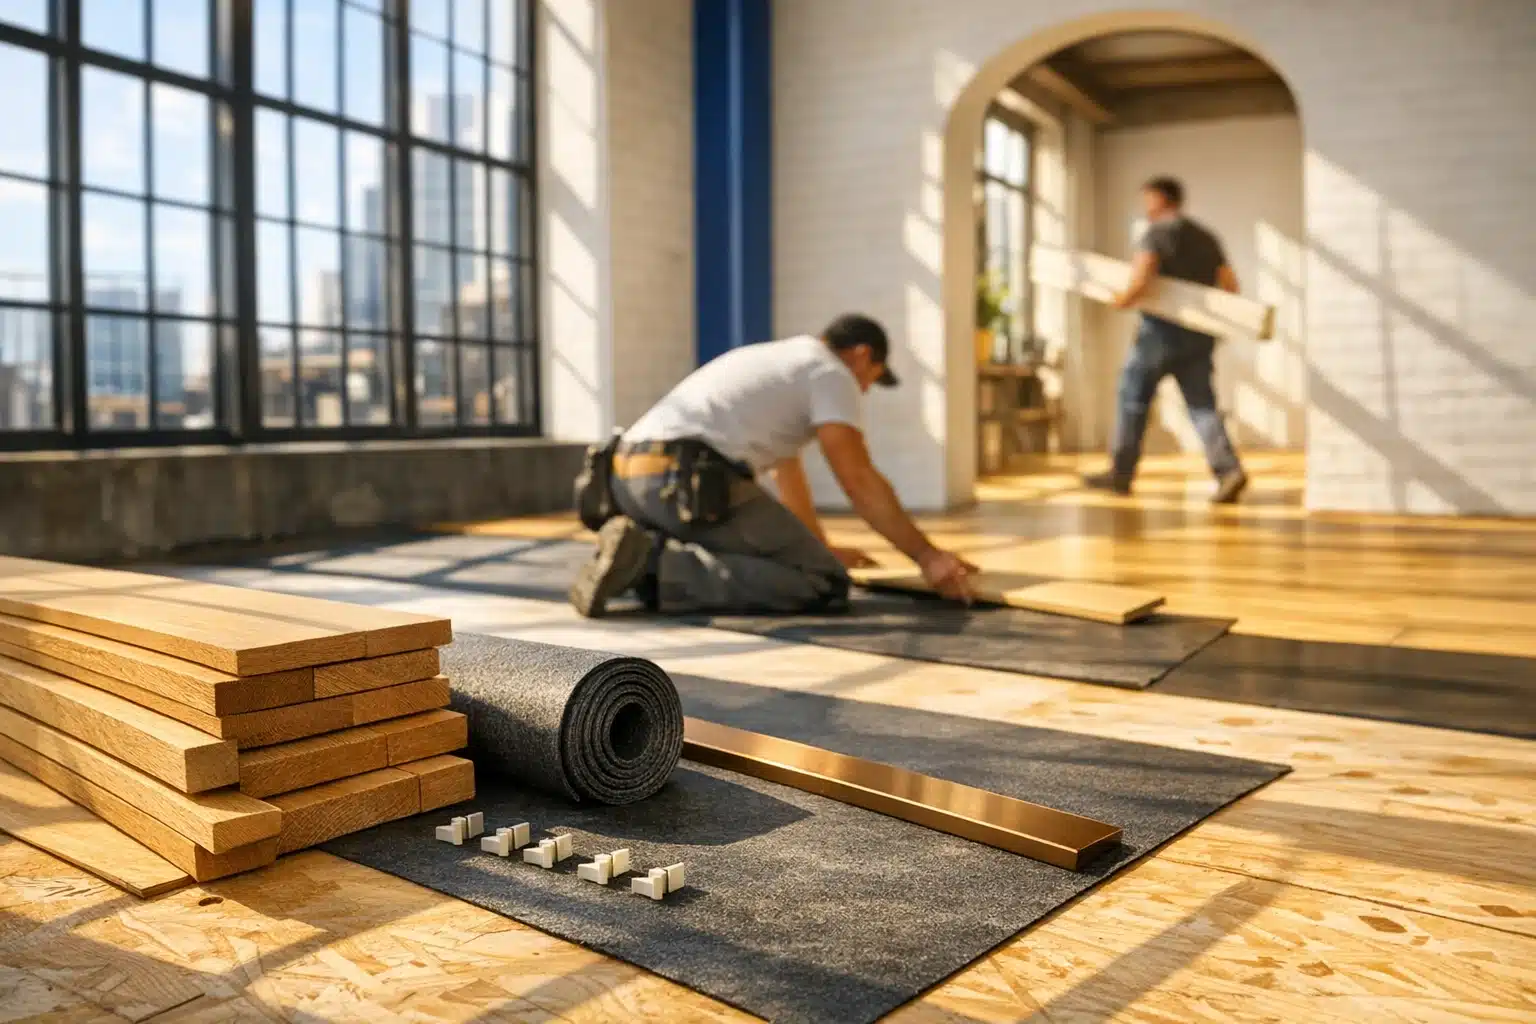
What Floor Installation Services Include from Preparation to Final Finish
Many people imagine floor installation as a simple sequence: bring in material, cut it to fit, and finish the room. In practice, professional installation is a layered service, and the visible surface is only the last chapter. The quality of the result often depends more on preparation than on the top material itself. Experienced installers begin with site measurement, room assessment, and subfloor evaluation. They look for uneven areas, old adhesive, squeaks, loose boards, moisture problems, and height transitions between rooms. That inspection matters because a premium floor placed over a weak base can fail in surprisingly ordinary ways, including movement, hollow spots, cracked grout, curling edges, or premature wear.
Different materials also require different installation methods. Hardwood may be nailed, stapled, glued, or floated depending on the product and subfloor. Engineered wood and laminate frequently use click-lock systems, which can speed installation but still demand a level surface and proper expansion gaps. Vinyl plank may be loose laid, clicked, or glued, and each method changes labor time and repair options. Tile involves one of the most labor-intensive processes: subfloor reinforcement if needed, layout planning, mortar application, tile cutting, spacing, grouting, and curing time. Carpet installation adds its own sequence, including tack strips, pad placement, stretching, trimming, and seam management. Good installers do not just place flooring; they manage moisture barriers, underlayment, transitions, trim details, and cleanup.
A professional service typically includes several steps that homeowners should expect to see explained in writing:
• Measurement and material calculations, including waste allowance
• Delivery coordination and acclimation time where required
• Removal of old flooring, if included in the quote
• Subfloor leveling, patching, or minor repair
• Underlayment, vapor barrier, or sound-control layer installation
• Final fitting around doors, cabinets, vents, and thresholds
• Baseboard, shoe molding, or transition strip finishing
• Debris removal and basic post-installation cleanup
There is also a scheduling side that deserves respect. Some floors can be installed and used quickly, while others need curing time or restricted traffic for a day or more. Adhesives may need ventilation. Furniture may need to stay out longer than expected. In short, good installation services are part craft, part logistics. When they are done well, the finished floor feels almost effortless, even though a great deal happened underneath your feet before you ever stepped back into the room.
Building a Realistic Budget: Materials, Labor, and the Hidden Costs
Flooring budgets rarely go off track because homeowners forgot to price the actual floor. They drift because the supporting costs were underestimated or never discussed. Material cost is only one part of the total project. Labor, demolition, subfloor preparation, furniture moving, trim work, disposal fees, and stair details can reshape the final number very quickly. A sensible budget starts by separating the project into categories instead of asking for one vague all-in figure. That approach makes quotes easier to compare and exposes where one contractor may be including services that another leaves out.
Broad cost ranges can help with early planning, though local pricing varies by market, product quality, and job complexity. In many regions, laminate may fall at the lower end of installed costs, while hardwood and tile often land higher because of material price and labor intensity. Luxury vinyl plank commonly sits in the middle, offering a wide range of price points depending on wear layer, brand, and installation method. Tile can be especially unpredictable because a modest tile price can still produce a higher total if the layout is complex or the subfloor needs reinforcement. Solid hardwood may require sanding and finishing if site-finished, which adds time and expense compared with prefinished options. These are not fixed rates, but they illustrate a useful truth: the prettiest sample is not always the most expensive part of the project.
Several charges regularly surprise customers:
• Removal and disposal of old carpet, tile, adhesive, or underlayment
• Moisture mitigation or subfloor leveling compounds
• Door trimming and appliance disconnection or reconnection
• Transition strips between rooms with different floor heights
• Baseboard removal and reinstallation
• Stair noses, stair treads, and landing details
• Extra material for angled rooms, closets, or pattern matching
One practical rule is to keep a contingency fund of around 10 to 15 percent for repairs or adjustments discovered after the old floor comes up. That is not wasteful pessimism; it is renovation realism. A floor can hide water damage, cracked underlayment, or dips that only become obvious once the room is bare. It also helps to compare quotes by square footage, product specification, and scope of labor rather than choosing the lowest number on the page. A bargain quote that excludes moisture testing or surface prep can become the most expensive choice later. Good budgeting means knowing where the money goes before the installers arrive, not after the invoice lands on the table like an unwelcome final plot twist.
DIY or Professional Help: How to Compare Options and Choose the Right Installer
Some flooring projects are DIY-friendly, while others are far less forgiving than video tutorials suggest. A simple click-lock floor in a small square bedroom may be manageable for a patient homeowner with accurate tools and time to spare. A whole-house install with stairs, uneven subfloors, heavy furniture, trim carpentry, and moisture-sensitive materials is another story entirely. The real comparison is not only labor cost versus personal effort. It is also risk versus reliability. Mistakes in flooring tend to stay visible. Uneven seams, poorly cut door frames, shifting boards, cracked grout lines, and incorrect expansion spacing can turn a money-saving plan into an expensive correction job.
Professional floor installation services bring experience, specialized tools, and usually a clearer workflow. Installers know how to stage material, check room conditions, read manufacturer instructions, and solve odd room geometry without wasting boxes of product. They also understand the less glamorous but crucial details, such as moisture testing for concrete slabs, acclimation periods for wood products, and the difference between a minor subfloor dip and a serious structural issue. In many cases, manufacturer warranties are also easier to preserve when installation follows documented standards. That does not mean every contractor provides the same quality, so selecting a service deserves careful attention.
When comparing installers, homeowners should ask practical, specific questions rather than relying on confidence alone:
• Is the estimate itemized by materials, labor, removal, prep work, and finishing?
• Are you licensed or registered where required, and do you carry insurance?
• What preparation is included if the subfloor is uneven or damaged?
• Who moves furniture, removes baseboards, and disposes of debris?
• How long will the room be out of use after installation?
• What workmanship warranty is offered, and what does it exclude?
• Can you provide recent references or project photos for similar jobs?
A written quote should describe product type, thickness or grade if relevant, underlayment details, transition pieces, and any assumptions about the existing subfloor. Vague language creates disputes later. It also helps to notice how clearly a contractor communicates before the job begins. Fast replies, precise measurements, and realistic timelines are usually better signs than flashy promises. In home improvement, skill often speaks in calm details. The right installer is not the one who says everything will be effortless; it is the one who shows exactly how the work will be handled when the room stops being a brochure image and becomes a real construction site.
Maintaining New Floors So They Stay Attractive and Perform Well
A new floor can transform a room in a day, but keeping it in good condition is a long game made up of small habits. Maintenance is not glamorous, yet it protects the money spent on both materials and labor. The best cleaning routine depends on what is underfoot. Hardwood usually benefits from dry dust removal and manufacturer-approved cleaners rather than excess water. Laminate should be treated carefully around standing moisture because swollen edges are difficult to reverse. Vinyl is generally easy to clean, but grit should still be swept regularly to reduce dulling and fine scratches. Tile is durable, though grout lines may need sealing or periodic deep cleaning. Carpet demands vacuuming consistency and prompt stain treatment if appearance is a priority.
The biggest enemies of many floors are surprisingly ordinary: dirt, moisture, furniture friction, and neglect. Entry mats reduce abrasive grit before it travels deeper into the home. Felt pads under chairs and tables help protect finishes from scratching. Spills should be cleaned quickly, even on water-resistant surfaces, because seams and edges remain vulnerable on some products. Homes with large humidity swings should pay special attention to wood flooring, since expansion and contraction can create gaps or cupping over time. In rental properties or busy family homes, establishing a simple care routine usually matters more than occasional deep cleaning marathons.
A useful maintenance checklist looks like this:
• Sweep or vacuum regularly using settings appropriate for the material
• Wipe spills promptly instead of letting moisture sit
• Use rugs or mats in high-traffic entry points
• Add protective pads to furniture legs
• Avoid harsh chemicals, abrasive scrubbers, and unsuitable steam cleaning
• Follow manufacturer guidance for refinishing, resealing, or grout care
• Inspect transitions and trim occasionally for movement or damage
Long-term care also involves knowing when maintenance becomes repair. Scratches in hardwood may be screened, refinished, or spot-repaired depending on depth. Cracked tile or loose planks should not be ignored because minor issues can spread with traffic. Some floors, especially quality wood products, reward owners with years of service and even aesthetic character as they age. Others depend more on consistent surface protection and timely replacement of damaged pieces. The good news is that floor care does not need to feel like a second job. When good installation meets sensible upkeep, a floor settles into the background in the best possible way: it simply does its work, day after day, while the room around it continues living.
Conclusion: Planning for a Floor That Lasts
For homeowners, landlords, and renovators, the smartest flooring decision comes from matching material, installation method, budget, and maintenance expectations from the start. A stylish product alone does not guarantee a good outcome; the subfloor, installer skill, room conditions, and long-term care plan all matter. If you are comparing floor installation services, ask for detail, not just a price, and treat preparation as part of the product rather than an optional extra. The payoff is straightforward: fewer surprises during the project, better performance after move-in, and a finished floor that looks intentional instead of merely new. When the planning is solid, every step that follows feels more secure.